Well here we are watching paint dry…lol
Day 2 of the salt technique, now that the paint and salt are dry, we are ready to remove the salt and create some amazing cards.
I feel that the background technique that I am sharing, speaks volumes in terms of your card, so I kept the inking simple. One image, a greeting and a bit of bling! Enjoy the video and be sure to comment below about what colour combination you have used or are thinking of trying for your salty background.
To create this stunning card, you will need the following supplies:
Your amazing salted Brusho Background, trimmed to 3/3-4″ x 5″
Basic Black cardstock #121045, cut at 3-7/8″ x 5-1/8″
Whisper white cardstock #100730 cut at 4-1/4″ x 11″, scrap 1/2″ x 3″
A perk of being a demonstrator, is that we do card swaps when a new catalog releases.
A few of the reasons I like swaps are:
It allows me to get ideas from stamp sets I may not have purchases (…yet)
It allows me to share these ideas with my customers
I am able to take these ideas and CASE them for future class/workshops
It increases my supply of beautiful handmade cards
I love to send cards to my customers to say thank you for their orders, if I have a card created with one of the sets they order, I will include it for inspiration
It inspires me to either re-create the card, share the card, or take the colour combinations from a card and use it in another way and lastly ideas for card layouts.Take 5Take 5 minutes to view the video and be sure to share your favourite cards with me! Thanks for watching and may it inspire you to create your own handmade greeting cards!
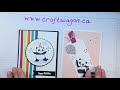
Power to the Pandas! Pink Power! When I first spotted this stamp set I went a little ga-ga over it! I couldn’t wait to get my hands on it and start crafting away! This card was born out of card swap with fellow demonstrators. I love the combination of powder pink and berry burst ( both new In Colours). I think the silver glitter balloon makes this card POP! (pun intended)
Shop my online store for all the supplies to create your very own Pink Panda Power card.
What a feeling it is to create! I love that I can sew and donate my handcrafts to a wonderful cause.
This is my latest creation: A charity quilt for a guild that I belong to. I was attracted to the colours in the border and the focal fabric. As I was creating the pinwheel block, I couldn’t help but think of Sweden and IKEA.
Here is close-up:
I will now need to start the quilting process. I am trying to decide if do squiggles or stitch in the ditch. What are your thoughts?
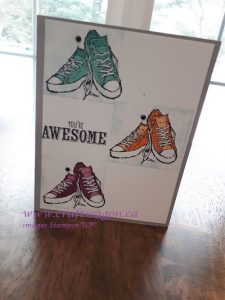
When I saw this stamp set it looked like he was juggling, so I thought why not juggle multicoloured confetti? I tied it in with coordinating paper scraps. I coloured the dots on the hat to coordinate with the inks using my blender pen.
It seems lately I have been drawn to using my 1/2″ bits for greetings and embossing them! It’s a phase.
Leave a comment to let me know which colour is your favourite?
I found this card went together fairly quickly when I had all the bits embossed and pre-cut. Want to give it a try? Click on the video to learn how:
Interested in creating your own handmade cards? Check out my online shop.
Stamps: Party Pandas Stamp Set 147221(c) 147218(w)
*free when you order $60 at my online shop
Other: Heat Tool (129053), Embossing Buddy (103083), SNAIL (104332), Stampin’Dimensionals (104430) Mini Stampin’ Dimensionals (144108), Big Shot (143263)
Measurements:
Basic Black: 4-1/2″ x 8-1/2″, and scrap 1/2″ x 4″ scrap to cut out medallion (approx 3-1/2″ square)
Whisper White: 4′ x 5-1/4″ (cut 2), scrap for stitched shape ( approx 3″ square)
Scraps cut all colours 5-1/4″ x 1/4″
Well here I am on Monday, attemping to record a video for my weekly post and what happens? It takes me the entire day to get it all together. Wow! I think to myself, do I really want to post this? Then I realize, that I am not the only one who is playing with this new product and not yielding the “As Seen On TV” results I was hoping for.
So here is a video on the card that made the directors cut! Enjoy!
Please leave a comment and share your successes and challenges with this new product.
If you would like to create this card at home, please go to my online shop and order the supplies .
Ink: Versamark Pad 102283
Brusho Crystal Colour 144101 (Brilliant Red and Prussian Blue)
Paper:
Whisper White 100730 Cut: 8-1/2″ x 5-1/2″
Dapper Denim 141414 Cut:5-1/4″ x 4″
Perfect Plum 101889 Cut: 5″ x 3-3/4
Shimmery White 101910 4-3/4″ x 3-1/2″
Basic Black 121045 scrap for greeting (approx 3/4″ x 3″)
Other:
Heat Tool, SNAIL adhesive, dimensionals, embossing buddy, water, paintbrush or aqua painter, painters tape
Instructions:
1. Ink up dragonfly stamp with versa mark and stamp on shimmery white card stock.I did mine on angle to the left side of the card, sprinkle with white emboss powder and heat set.
2. Attach to a work board using painters tape, covering approx. 1/4″ of the edges- this will create a nice border when done.
3. Put a small amount of water on an acrylic block, shake a small amount of blue and red brusho on block to create purple, dab the purple randomly on the wings of the dragonfly.
4. Clean block, add water and blue brusho, mix together and repeat above step with the blue. Heat set
5. Add additional water to create a light wash, using a wide flat paintbrush or aqua painter, wash in this colour around the dragonfly, be sure to leave some white space. Heat set.
6. Carefully remove the painter tape.
7. Fold Whisper White card stock in half to create card base
8. Adhere Dapper Denim and then Perfect Plum mat to card base, set aside
9. Ink up greeting with versa mark and stamp on black card stock. Sprinkle silver emboss powder and heat set, flag the right side. Adhere SNAIL to the back of the banner greeting and make a small nest with the the silver thread and stick to the adhesive, attach greeting towards bottom right of card.
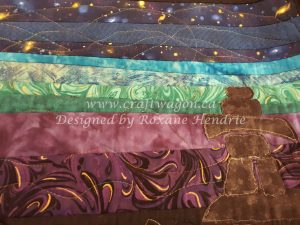
That’s it, no other guidelines! I knew right away that I had the right fabric, leftover strip sets from my Bargello Quilt. I had a vision in my head and began the research (aka – surfing the internet- the only surfing you will see this girl do!)
My idea was blues and purples with a touch of green. Have you ever searched “aurora borealis”? well some of them are an intense green and black. This did not match the vision in my head. So I pressed on… yes countless hours on the internet, completely distracted by the original intention of the project. I did find a great recipe for my Instant Pot along the way!
There were a lot of different ideas floating around, and I had thought of creating a mini bargello. But time was ticking. I also thought that I wanted it to be a long narrow quilt, the same size as a Row by Row. When I pieced it together it seemed like the two elements were far away and disconnected. I shortened the piece to about 24″ and now I feel it tells a story. Have you ever created a bargello quilt?
I believe this one got missed being posted for October.
Christmas Countdown
12 weeks of Christmas
Countdown to Christmas with me. For the next 12 Sundays til Christmas, I will feature a sewing project that is either Christmas related or a gift idea. I would love to hear what sewing projects you are working on.
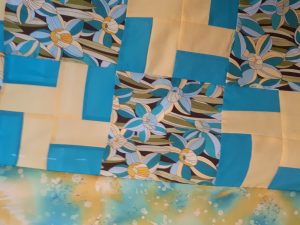
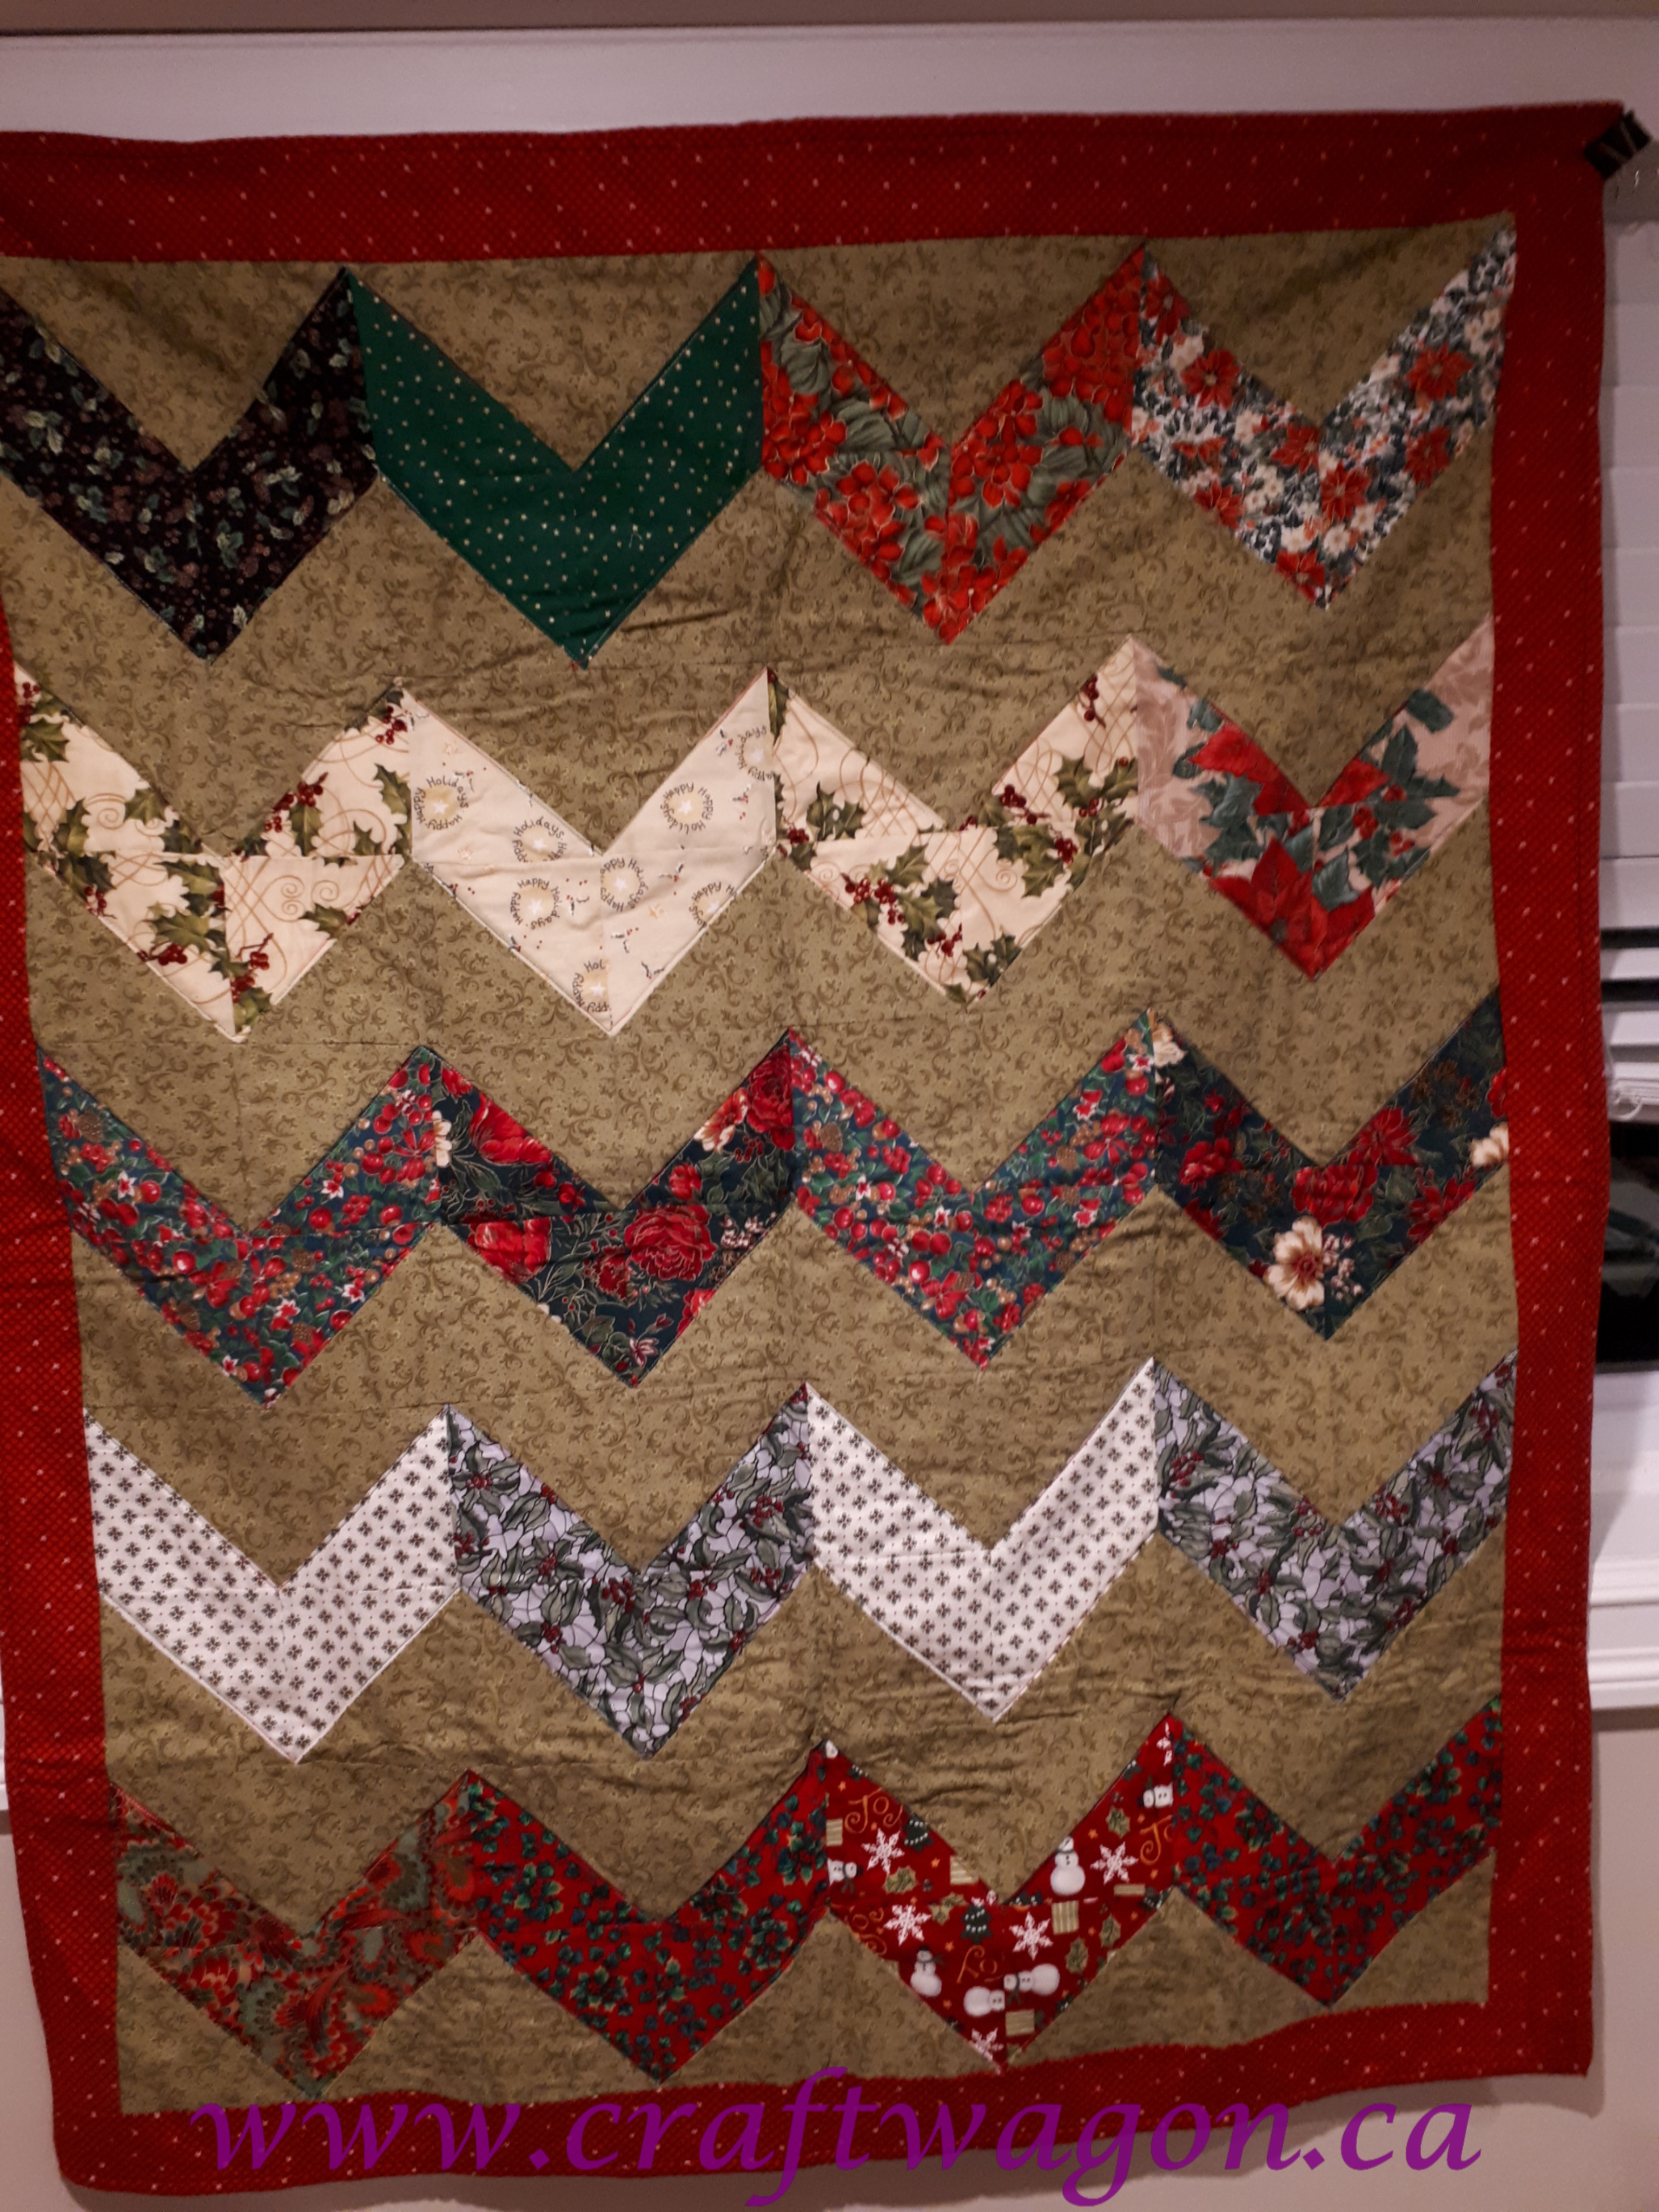
I created this quilt using 48 charm squares as part of my quilt guild’s President’s Challenge.
The challenge was to bring in 48 charm squares ( all the same) in exchange for 48 different charm squares the following month. We were challenged to create something with them. In an earlier post I shared what I made with my Halloween charms. Now if you know me, you know that I LOVE matchy-matchy, symmetry, geometric shapes…so a scrappy quilt is definitely a challenge for me.
I had a small postcard pattern for a chevron quilt on my wish list of things to try. What a great way to check two things off my list! I added the olive green background fabric, borders, backing and binding. It’s a small lap quilt size and would likely fit a toddler bed. It was pieced and quilted by machine. I like that it was a smaller quilt project that I could manage on my machine. I followed the chevrons for the quilting. Gift #1 is done!
Well here I am on Monday, attemping to record a video for my weekly post and what happens? It takes me the entire day to get it all together. Wow! I think to myself, do I really want to post this? Then I realize, that I am not the only one who is playing with this new product and not yielding the “As Seen On TV” results I was hoping for.
So here is a short video on my crafty adventure with brusho and the cards that made the directors cut! Enjoy!
To order the products in this video, go to my ONLINE SHOP.
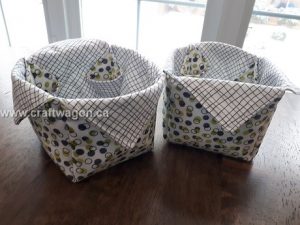
Here is a simple project to feature some of your favourtie fabric or to if you are shopping your stash!
There are lots of tutorials for this project, but I liked how this one had a lining and french seams!
I wanted to give a small gift to my coworker for her birthday. I gifted her a Me to We Education Rafiki.
Here is an excerpt from their website:
In Swahili, the word for friend is rafiki. This Rafiki helps a child in a developing community access education. With education, learners become leaders, and a textbook becomes a vehicle for discovery and exploration—expanding perspectives and building understanding across people and cultures.
When you receive your new Me to We Artisans accessory, look out for the unique code on the back of your product package! Enter it online at trackyourimpact.com to learn more about the life-changing impact your purchase makes.
I love that this gift supports education. There are other rafikis to choose from but I thought this one was fitting as we are educators.
And yes…I created a card to match:
Could this be a new thing? Cards coordinating gifts?
Leave me a comment below if you would like to see how to create the card
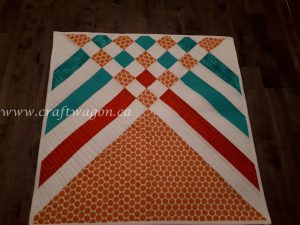
Well this year I am embarking on a new sewing challenge for myself: Modern Quilting
I went to our local Modern Quilt Guild, just in time to participate in the Christmas Gift Exchange. We were to create an 18″ x 18″ mini wall quilt. I toyed with the idea of a Christmas themed one, but thought that it would be used for a few months of the year. I was hopeful that the owner would love it so much that she would display it all year round!
I searched the internet for days, trying to find a design idea I liked or could jump off from to create my own…well the search was long, which meant my sewing time was short! Alas, I discovered this pattern on Craftsy. There is a short video tutorial to go along with it. The downloadable pattern has instructions for multiple sizes. The picture of the full size quilt looks amazing. I took the cushion pattern and adapted it to fit within the measurement constraints.
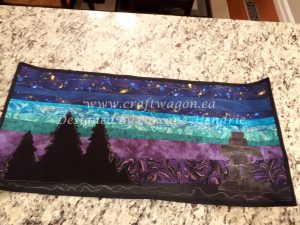
Here is the final product:
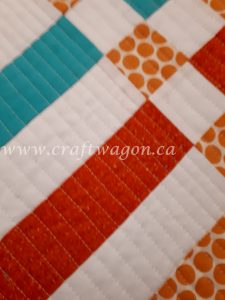
Here is a close up of the quilting. I did straight line quilting about 1/4″ apart. I am pleased with the finished piece…It was hard to give it away!
I did corner hangers and a corner label that doubled as a pocket so I could include a coordinating card:
The photo above was taken at the guild. Interesting how we interpret which end is the top!
Leave me a comment to let me know which way you prefer the design??Orange triangle at the top or bottom?
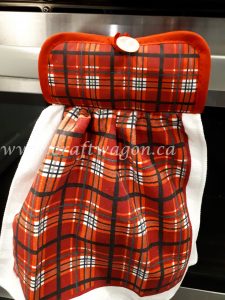
Well, it’s here!! Christmas is just around the corner. I have a quick and easy project that you can put together in under an hour. Not including a trip to the dollar store to collect your supplies. If you are like me, there are too many distractions.
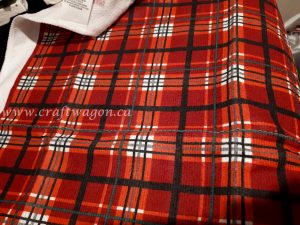
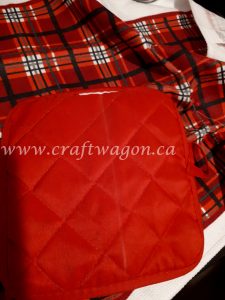
This year we are going for the Canadian Cottage Christmas theme. Red, white, black and plaid!!! This was a quick project I put together for an added touch to the kitchen.
Find the middle of the dishtowel and sew across using a gathering stitch. I turn the tension to 0 and the longest straight stitch. Make sure to leave tails at either end
Mark the middle of the hot pad with a removable marking pen, I use the Frixon pen as it dissappears.
Gather the towel so that it is as wide as the hot pad, then sew the towel to the hot pad on the marked line.
The gathering threads can be removed if you like.
Fold in half and position button. Sew button on
Done, attach to stove or dishwasher handle for a quick and easy decoration
Also great for drying hands!Leave me a comment if you have tried this!
Happy Crafting,

 ‘
‘ Stamp set used: Epic Celebrations from the Sale-a-bration 2018 flyer.
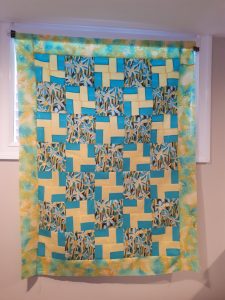


 The photo above was taken at the guild. Interesting how we interpret which end is the top!